Signing — electronic signature with identity verification
An electronic signature with identity verification is made in the browser and confirmed in two steps: a one‑time SMS code sent to the signer's phone and a confirmation on the signer's own device — a passkey unlocked with a fingerprint, face recognition or the device PIN. Both steps are a required part of this signature.
How to sign
-
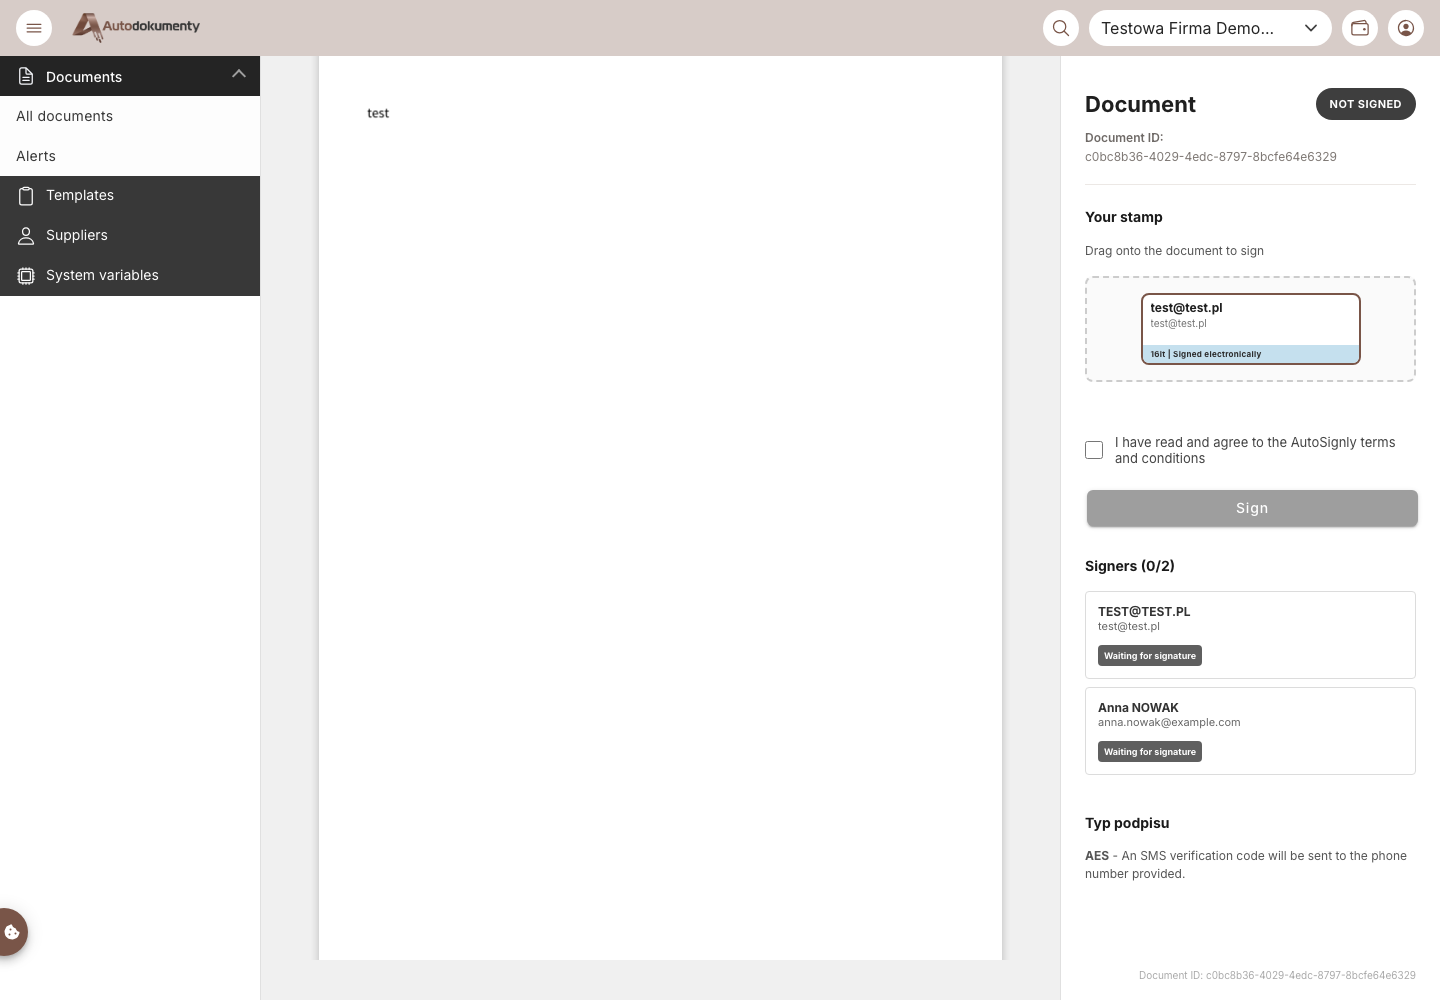
Open the signing link from the e‑mail (or Generate and sign document if you are a signer yourself). The signing view opens: the document on the left, the Your stamp panel on the right.
-
Drag your stamp onto the document to place it where the signature should appear.
-
Tick I have read the AutoSignly terms and click Sign.
-
A short guide, How document signing works, opens and explains the steps. Click Continue to proceed. The verification SMS code is sent only after you click Continue — clicking Cancel stops signing.
-
Enter the SMS code before the countdown ends and click Confirm:
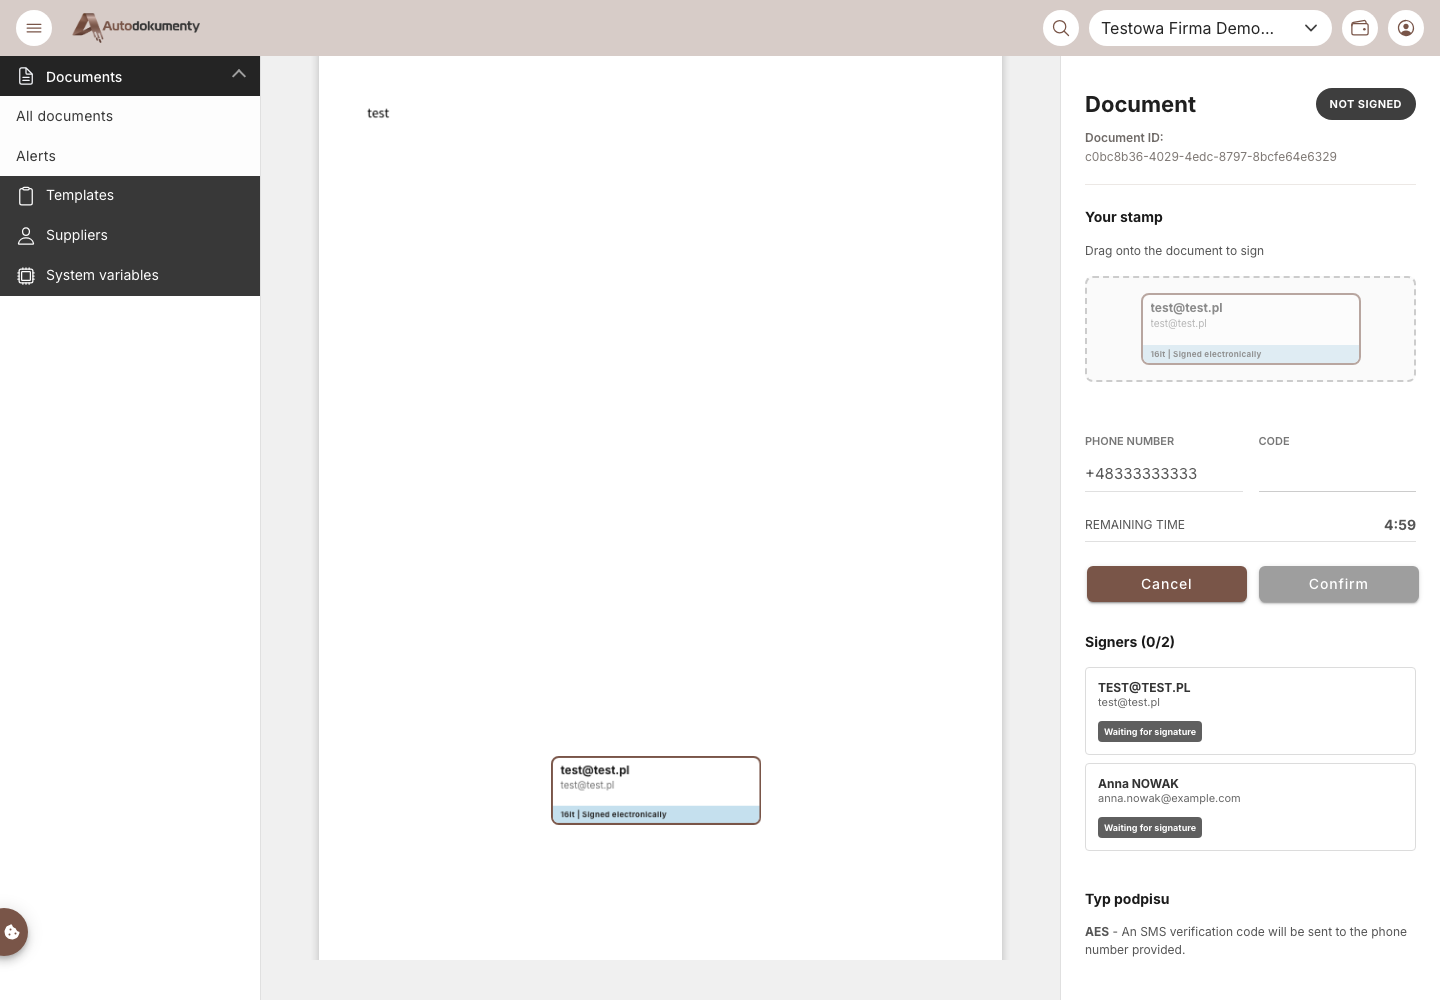
The code is valid for a short time and is tied to that phone number. If it expires or doesn't arrive, you can request a new one — a code can be re‑sent only after 5 minutes. Entering a wrong or expired code shows an error and lets you try again.
-
A Confirm identity on this device dialog appears and the browser opens a system passkey window. What you do here depends on whether this is your first signature on this device:
-
First signature on this device — the browser asks where to save your passkey. The exact window depends on your platform: on macOS / iOS confirm with Touch ID / Face ID to save the key in Passwords (iCloud Keychain); on Windows use Windows Hello (fingerprint, face or PIN); on Android use the device screen lock; or save it in a password manager. Confirm with Create / Save.
-
Later signatures on this device — pick the saved passkey tied to your e‑mail address and confirm with your fingerprint, face or device PIN when prompted.
-
Signing on another device — if you already have a passkey on another device and are signing here for the first time, enter the SMS code and click Confirm. When this device has no passkey yet (or you cancelled the system window), Register this device appears below the code fields. Click it and create a passkey as on your first signature — you can use several devices at once.
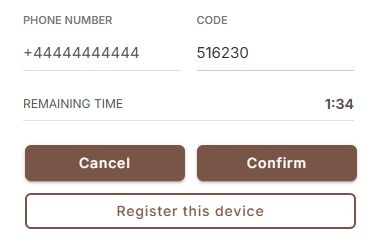
cautionThe browser's system window is part of signing. If you click Cancel there, signing is aborted and you have to start again. If nothing happens, check that the pop‑up window was not blocked.
-
The signer's stamp is added to the document and their status changes to Signed. The process then continues as described in Signing documents (status, verification, download).
If you see a message that you cannot sign on this device instead of the Sign document button, set up a Windows Hello PIN — see Windows Hello (PIN) — electronic signature with identity verification.
The passkey is tied to the signer's e‑mail address and stored per device. On a new device the signer simply creates a new passkey (again preceded by the SMS code) — there is no need to transfer anything between devices.
SMS + device passkey is the default verification method. If the issuer chose National Node (Węzeł Krajowy) instead, the SMS code and the device passkey are replaced by Log in with National Node, where the signer confirms identity through the national identity node.
For the legal value of this signature and how to require it when generating, see Generating with an electronic signature with identity verification.
Screenshots are generated automatically from the test environment and are available in Polish and English.