With an electronic signature with identity verification
Generate a document that requires an electronic signature with identity verification — a stronger signature whose identity is verified (e.g. by SMS), with high evidential value.
IF YOU ARE UNSURE WHICH SIGNATURE TO CHOOSE, CONSULT A LAWYER. 16IT IS NOT LIABLE FOR THE LEGAL CONSEQUENCES OF AN INCORRECT SIGNATURE CHOICE.
An electronic signature with identity verification within the meaning of Art. 26 of the eIDAS Regulation. The document is sealed three times with a qualified 16IT electronic seal (issuer: Krajowa Izba Rozliczeniowa) — before signing begins (integrity anchor), after the signature (confirming the signer's identity and intent) and after the document is closed (long‑term archiving).
Identity is verified by one of: SMS / Węzeł Krajowy / Open Banking. The time, IP, device and all process metadata are stored in an immutable audit log (6‑year retention — in line with the Trust Services Act).
The counterparty is the party of the document — it can be a company (Business) or a private person. The generated document is assigned to the selected counterparty and appears on the documents list (and on that counterparty's own document list).
Signing is a separate matter: a document must always be signed by a natural person — a company as such cannot sign. Signers are added in a separate step, when you send the document for signature — not here. Only a counterparty saved as Private can additionally be used as a signer. See Suppliers and Signatures.
1. Choose the signature type
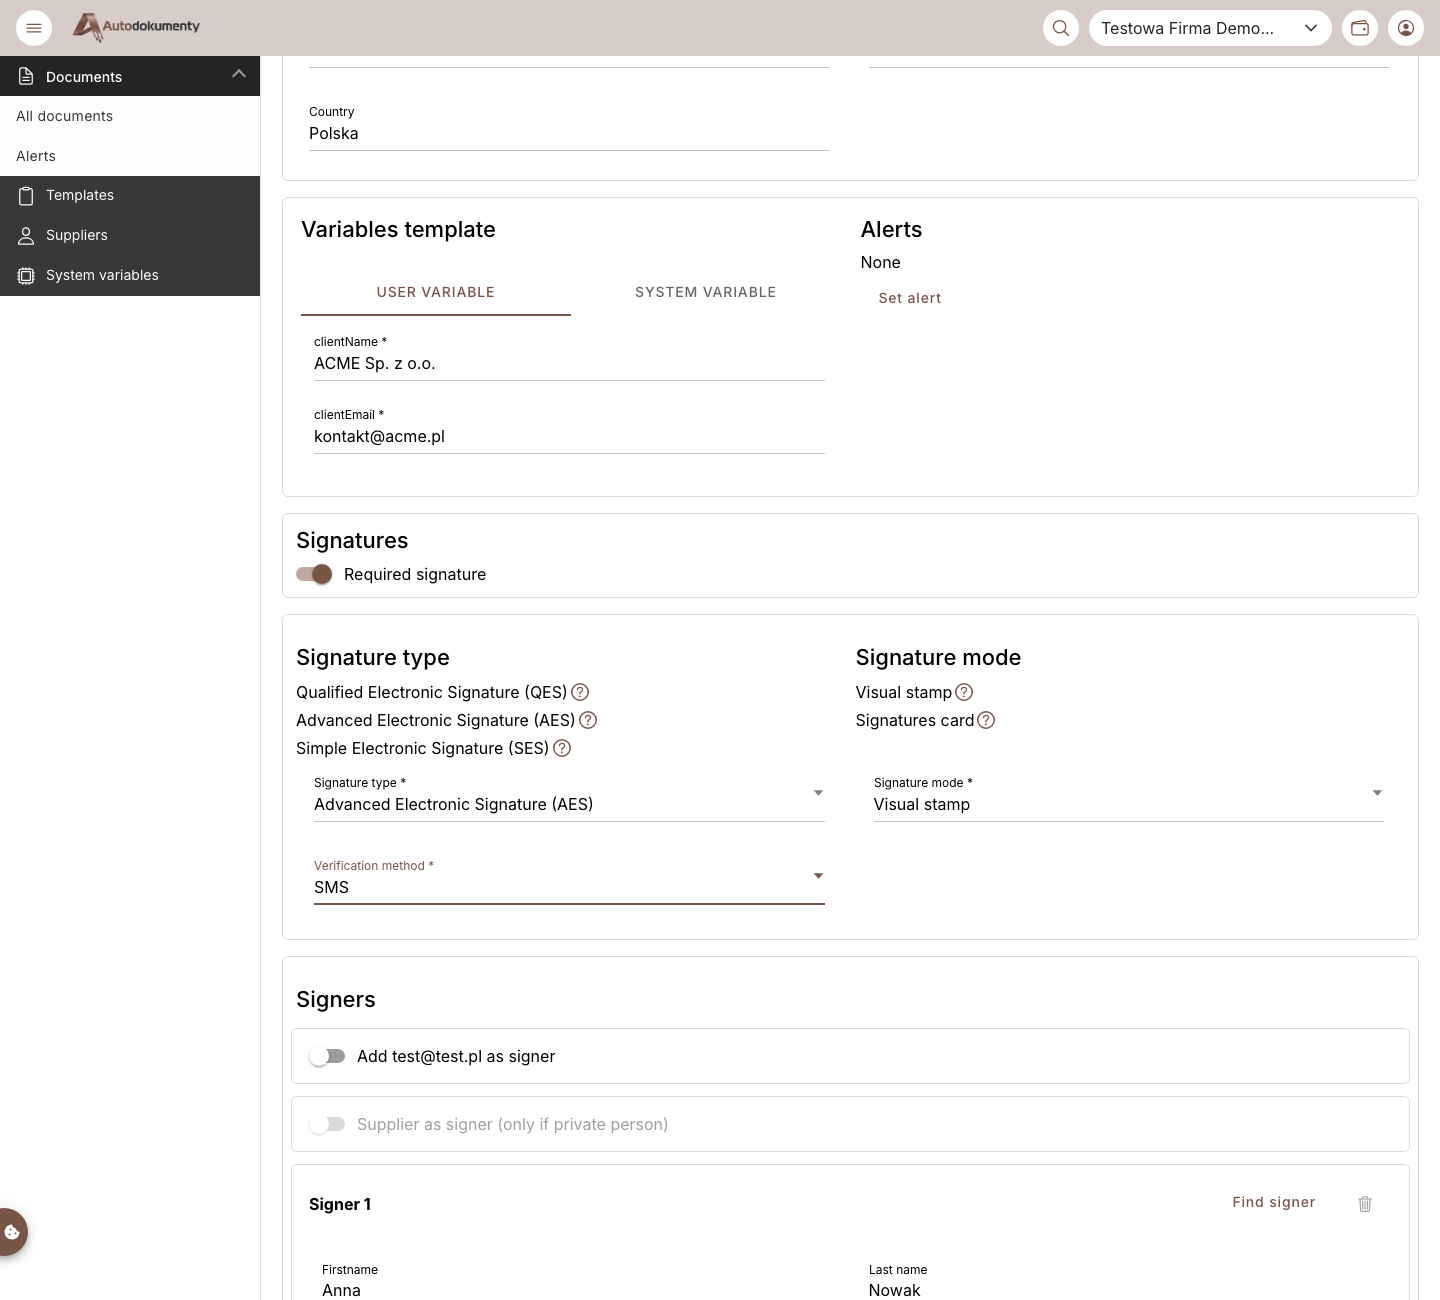
Start generating a document — from a template or from a PDF. In the Signatures section turn on Required signature, choose Electronic signature with identity verification from the dropdown, then pick a verification method — SMS, Węzeł Krajowy or Open Banking.
2. Add signers
In Signers, add the people who must sign — enter each one's name and e‑mail.
Turn on Change signature type under a signer to give that person a different type (and,
for the signature with identity verification, its own verification method).
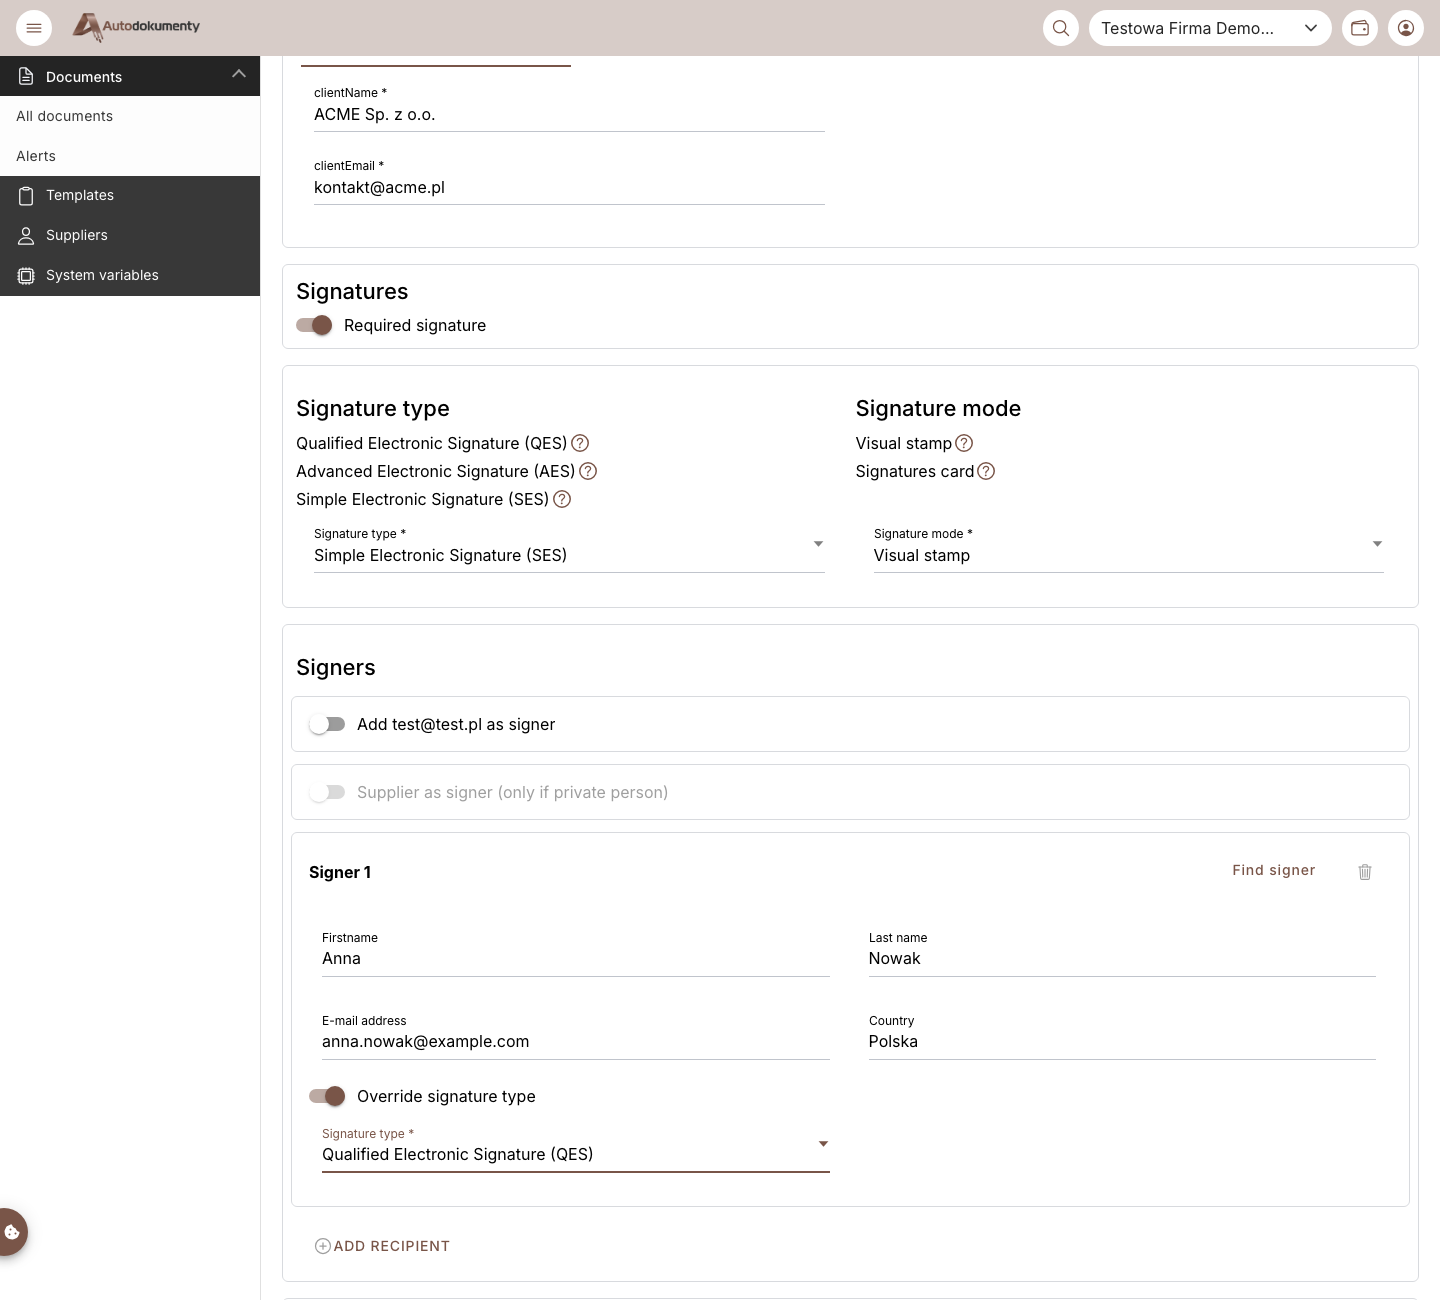
So you don't retype the same person every time, save them as a counterparty — on the Suppliers page or via Settings → Suppliers → Add — and mark them as Private (a natural person). Then in Signers use Find signer to load them, or turn on Supplier as signer (only if private person) to add the selected counterparty. Only Private counterparties can sign: a counterparty marked as Business (a company) cannot be a signing person.
3. Generate and send, or generate and sign
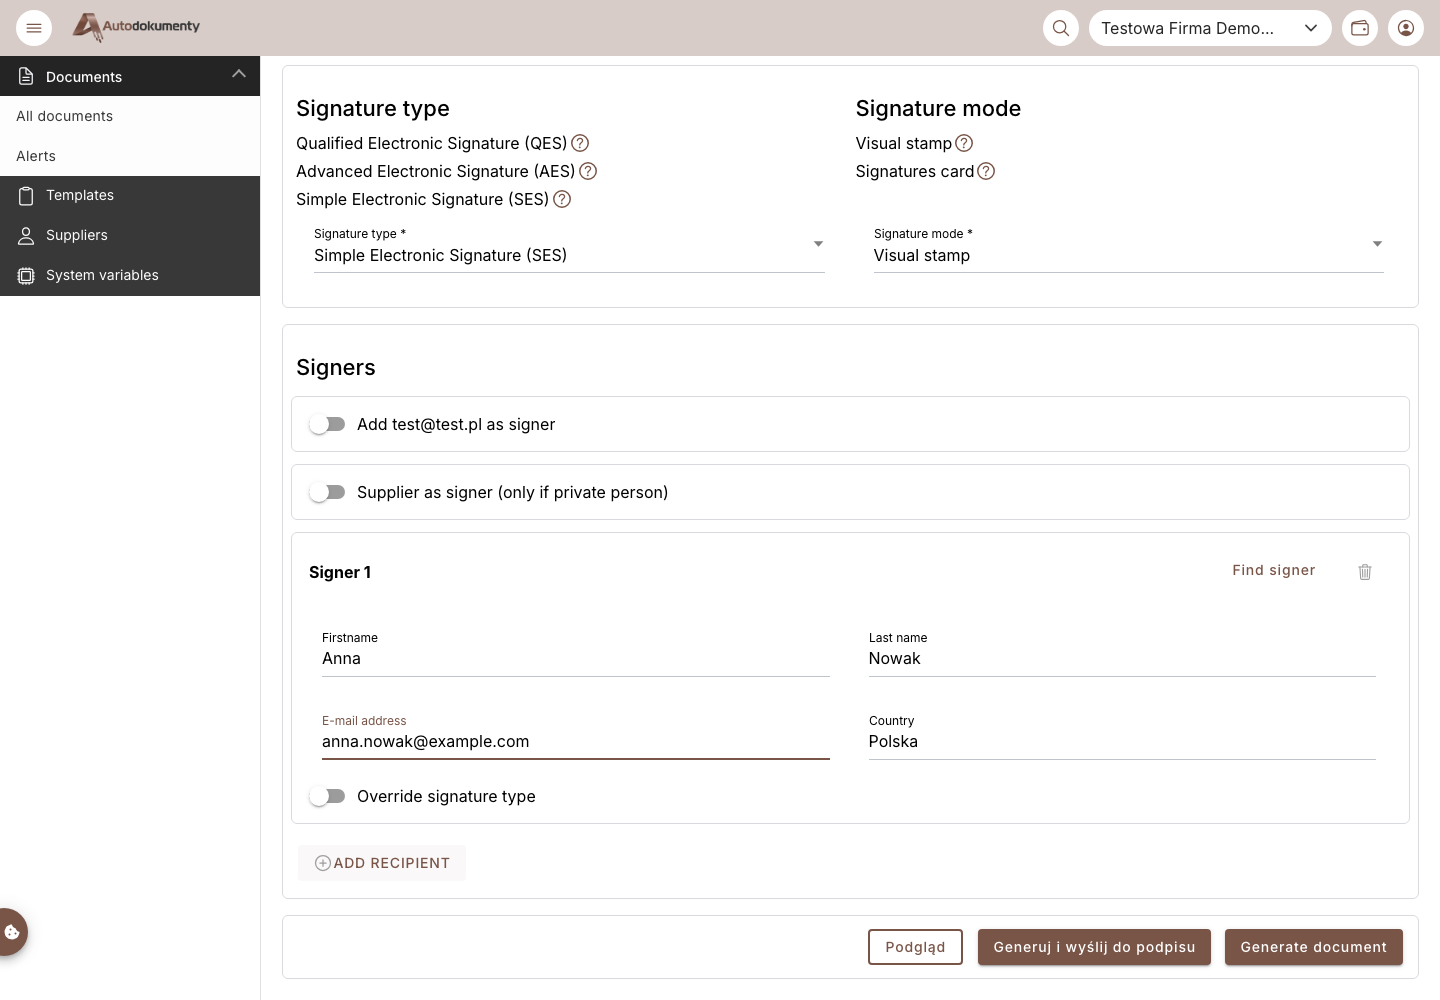
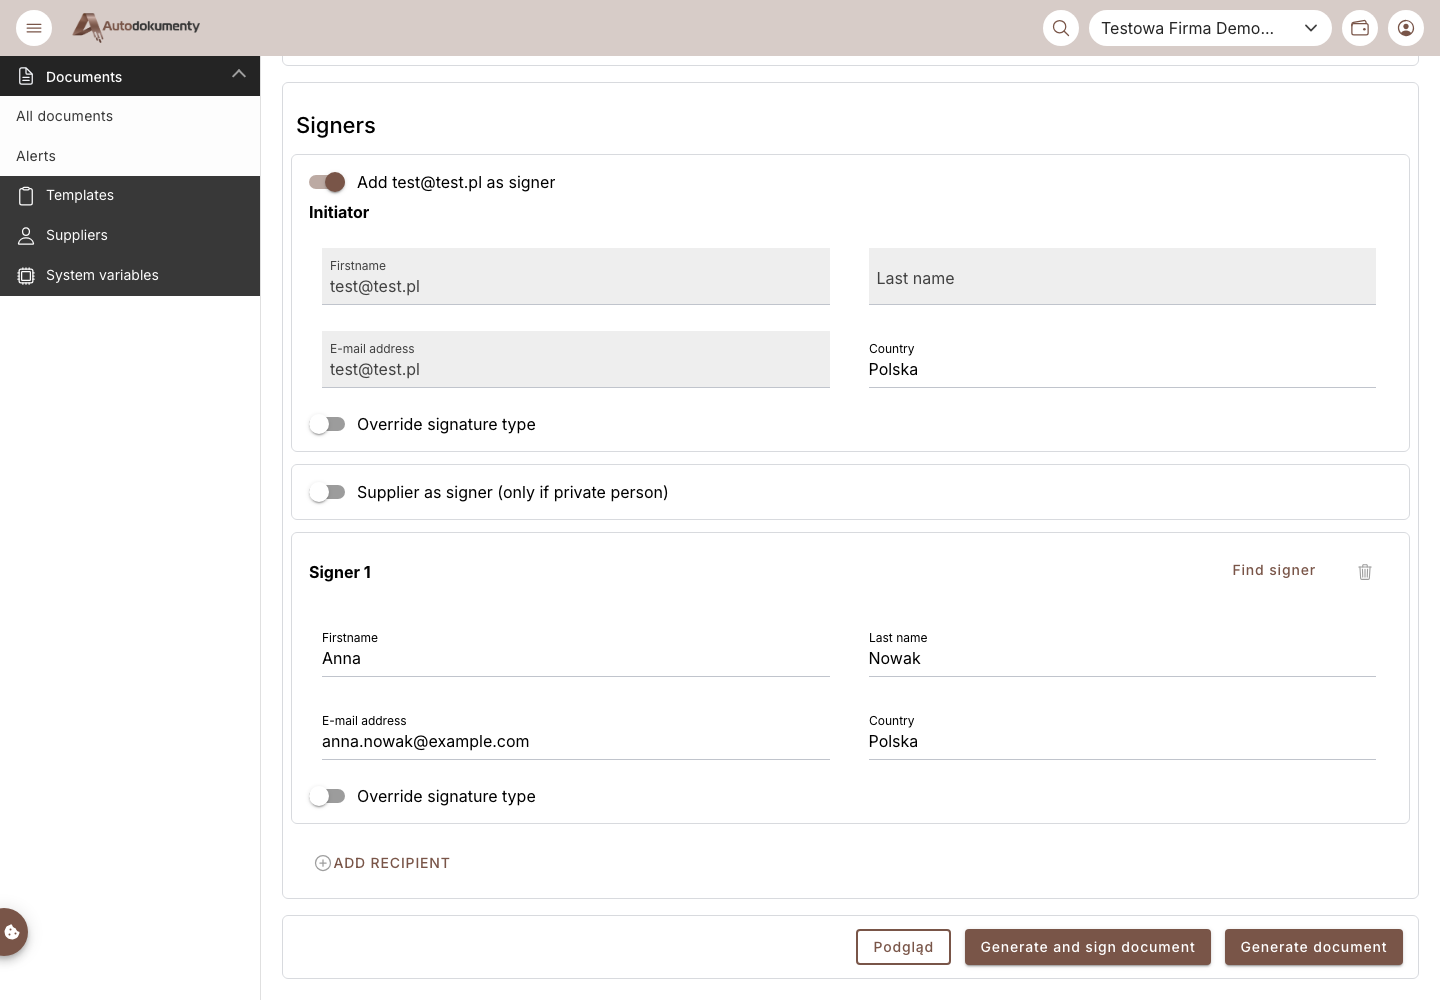
The Add [email protected] as signer toggle changes the action button:
-
Off → Generate and send to sign — created and sent to the listed signers.
-
On → Generate and sign document — takes you straight to the signing page.
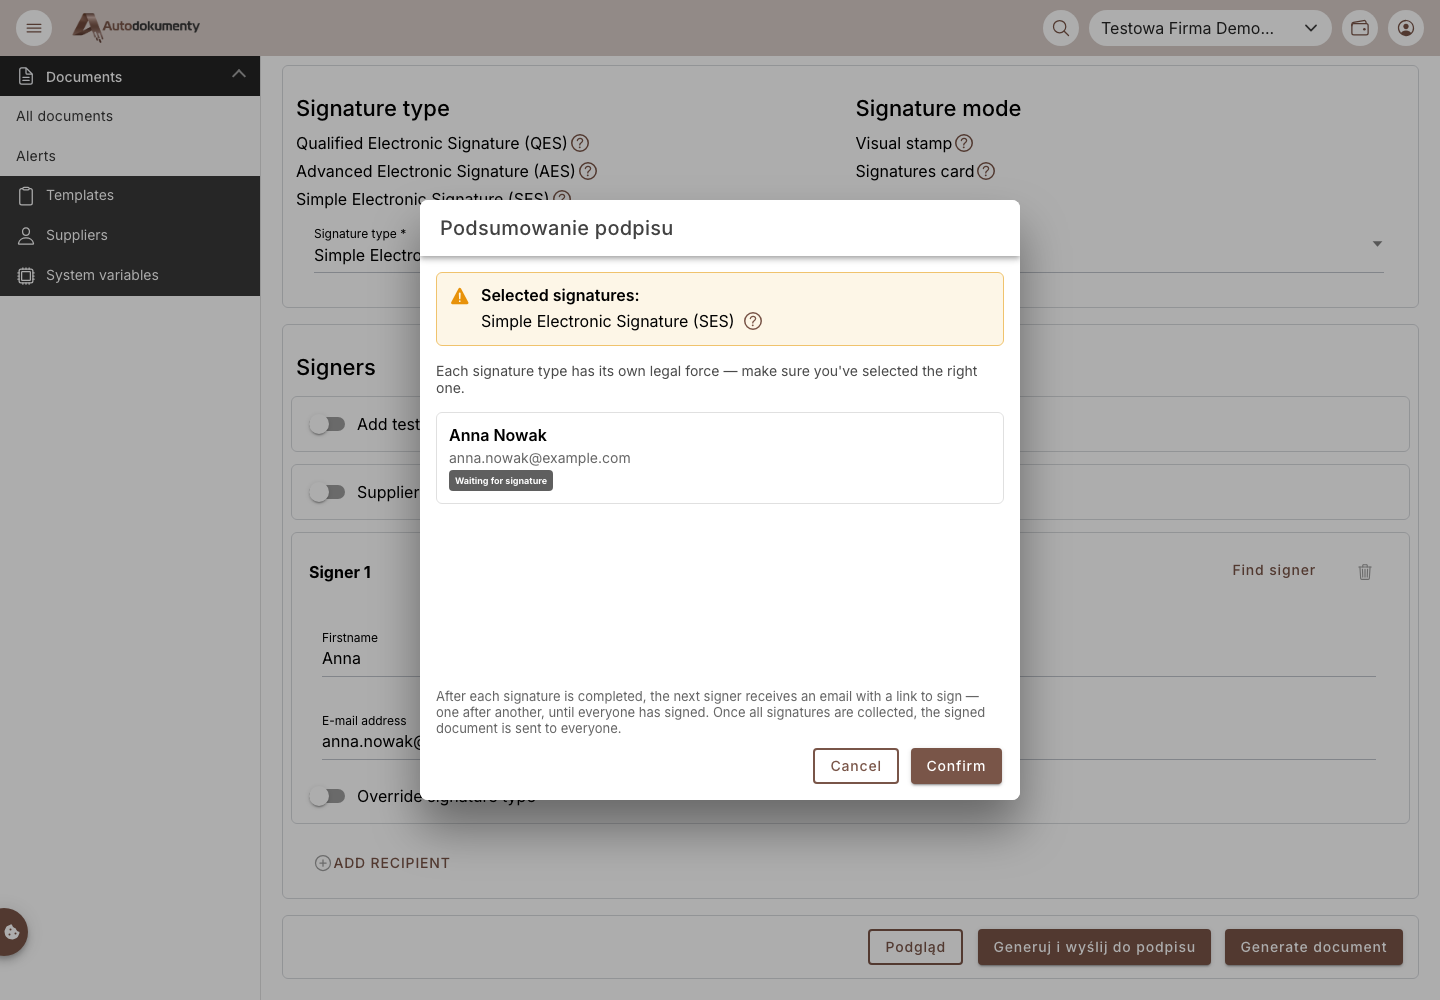
A signature summary appears first — review it and click Confirm:
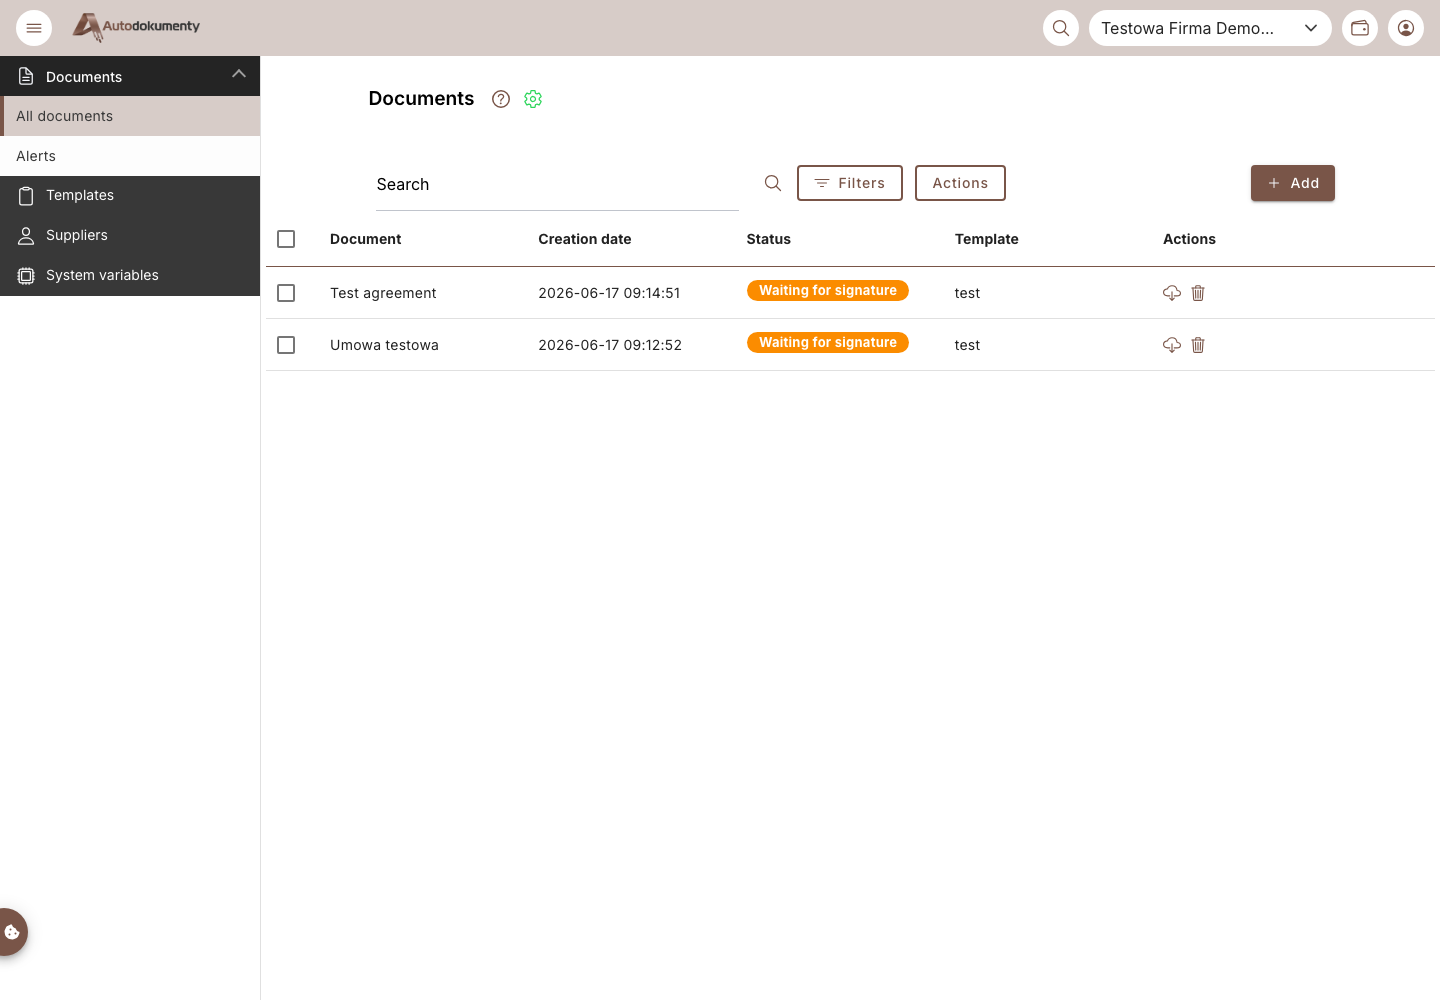
The document then appears on the documents list with status Awaiting signature:
See the signing flow in Signing documents.
Generate now, send later
You don't have to send the document right away. After choosing the signers, click Generate document (instead of Generate and send / sign). The document is created and appears on the documents list with a Send to sign button. Click it when you're ready — on the send‑to‑sign screen you can still edit the signers and the signature mode before sending.
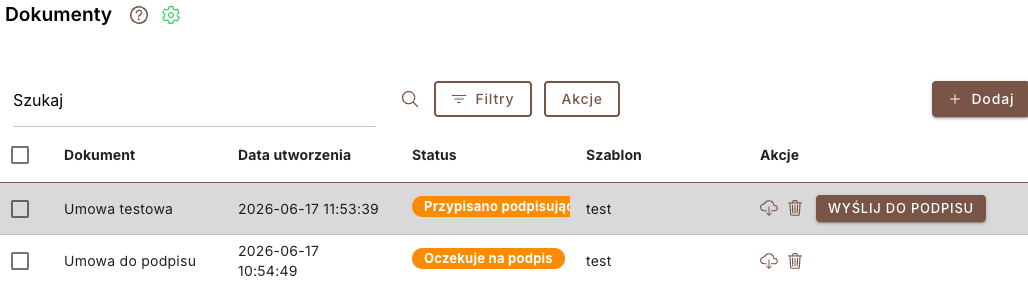
Clicking Send to sign opens the send‑to‑sign screen, where — before sending — you can edit the signers, the signature type and the signature mode:
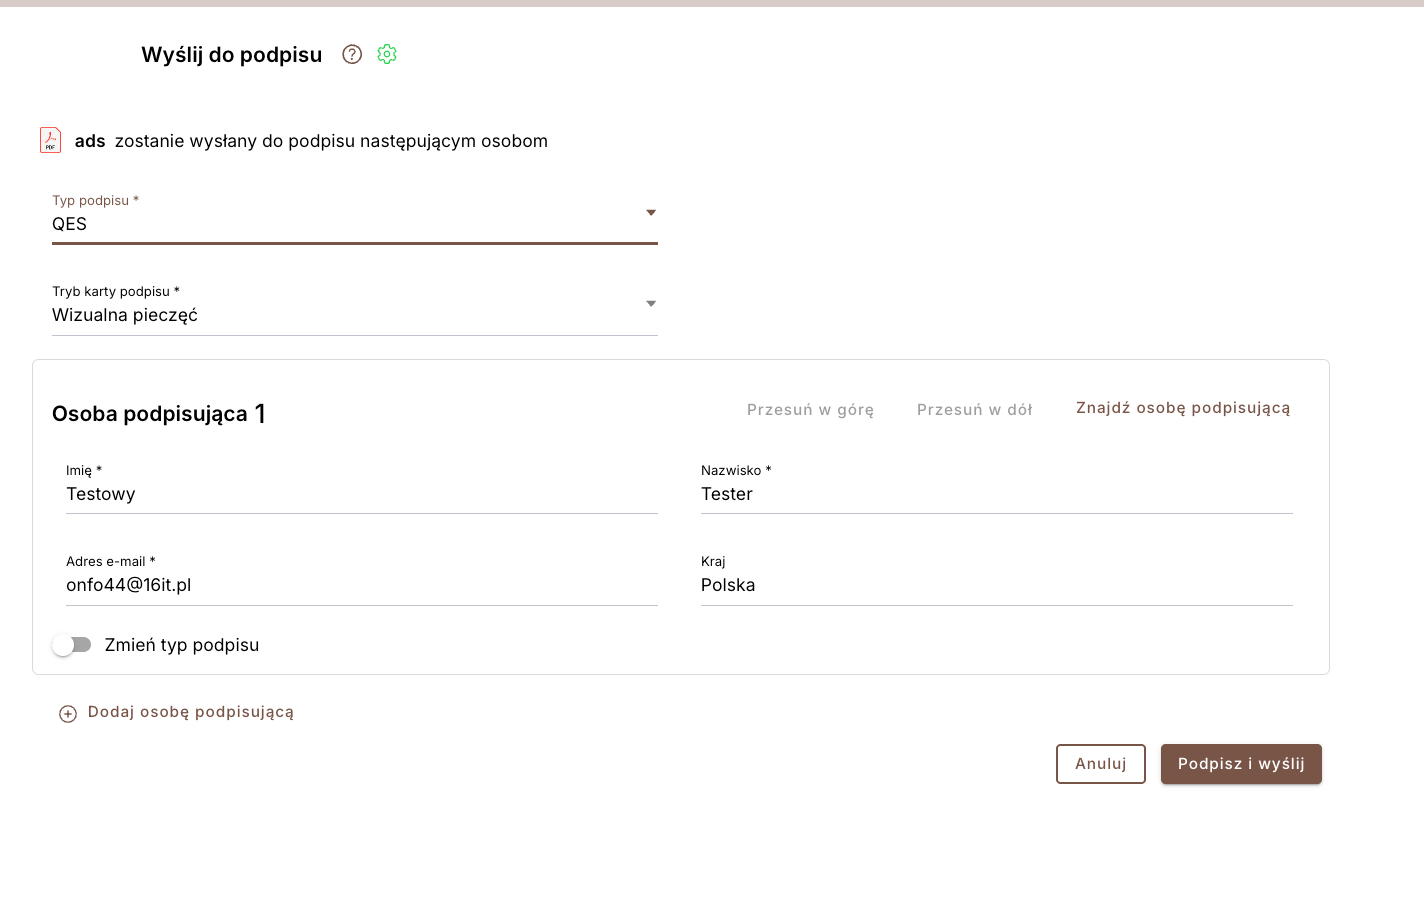
The signature type and signature mode are set on the document by whoever generates it (here, or on the send‑to‑sign screen). A signer who receives the document cannot change them — they sign with the type and mode you assigned.
Screenshots are generated automatically from the test environment and are available in Polish and English.