Adding a company
Before you can create and sign documents in Autosignly, you need at least one company in your account. The first time you sign in without a company, the app takes you straight to the Add company screen.
Prerequisites
- An active 16it account (you sign in through the shared 16it login).
- Your company Tax Id (NIP) — the app can pre-fill the rest of the data from it.
Step 1 — Open the Add company form
Sign in. With no company yet, you land on Add company automatically. The form has the company identification fields (Country, Tax Id, Name) and the address.
Step 2 — Fill in your company data
Enter the company details. Required fields are marked with *. You can type a Tax Id
(NIP) and click the download icon next to it to fetch official company data
automatically — Name and address fields are then filled in for you.
The screenshot below shows the form completed with example data:
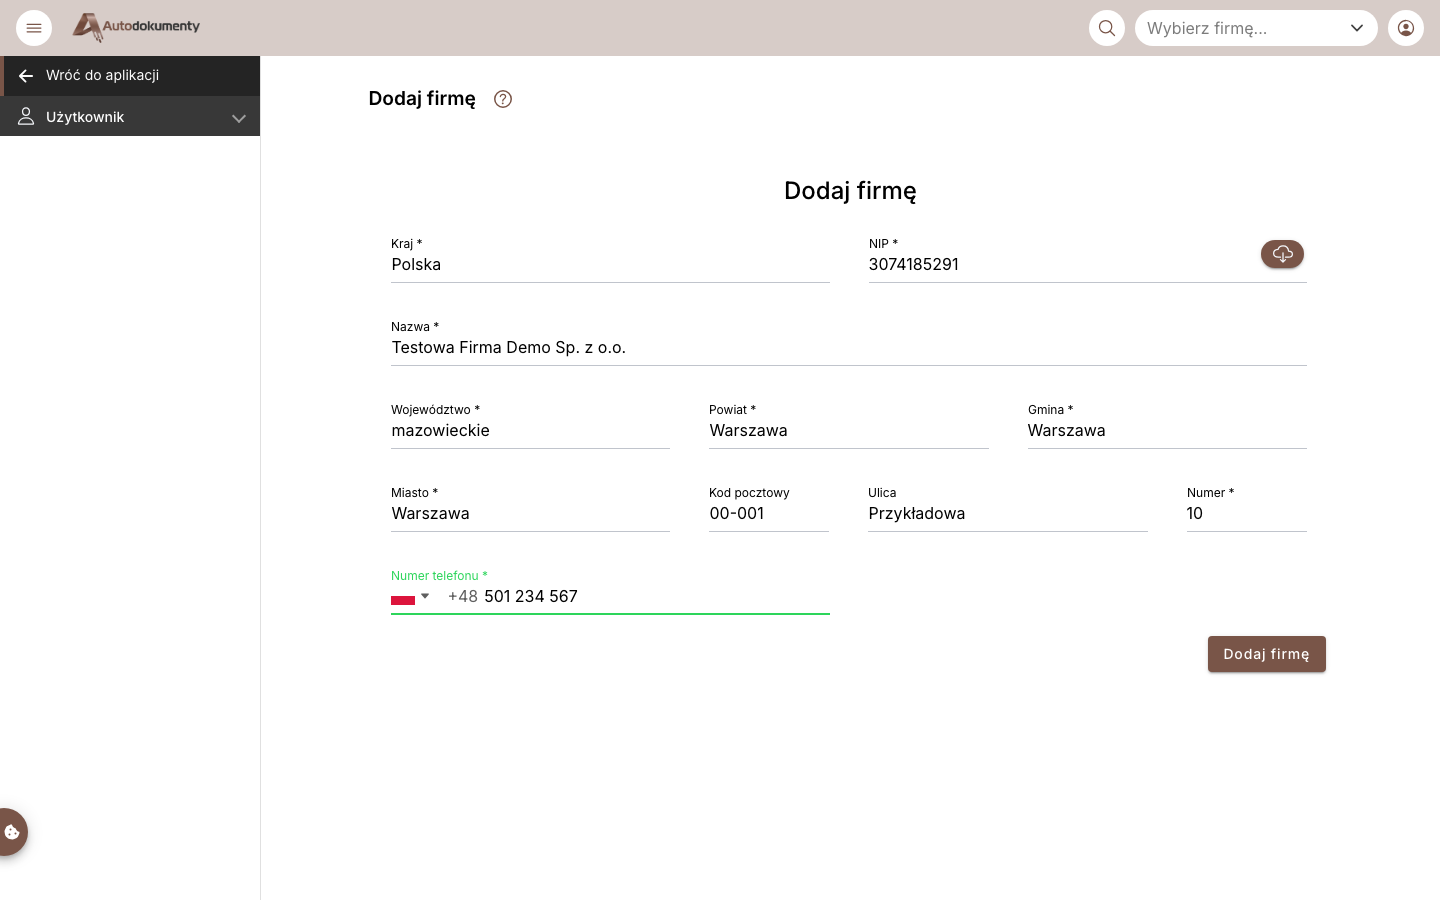
Example values used above:
| Field | Required | Example |
|---|---|---|
| Country | Yes | Polska |
| Tax Id (NIP) | Yes | 3074185291 |
| Name | Yes | Testowa Firma Demo Sp. z o.o. |
| City | Yes | Warszawa |
| Postal Code | No | 00-001 |
| Street | No | Przykładowa |
| Number | Yes | 10 |
| Phone number | Yes | +48 501 234 567 |
Step 3 — Add the company
Click Add company. The company is created and you are taken into the application.
What appears after adding the company
You land on the Documents list — the home of the app. Several things change:
- The left side navigation now shows the main sections: Documents (All documents, Alerts), Templates, Suppliers and System variables.
- The company picker in the top bar now shows your company (e.g. Testowa Firma Demo…).
- A wallet icon appears in the top bar.
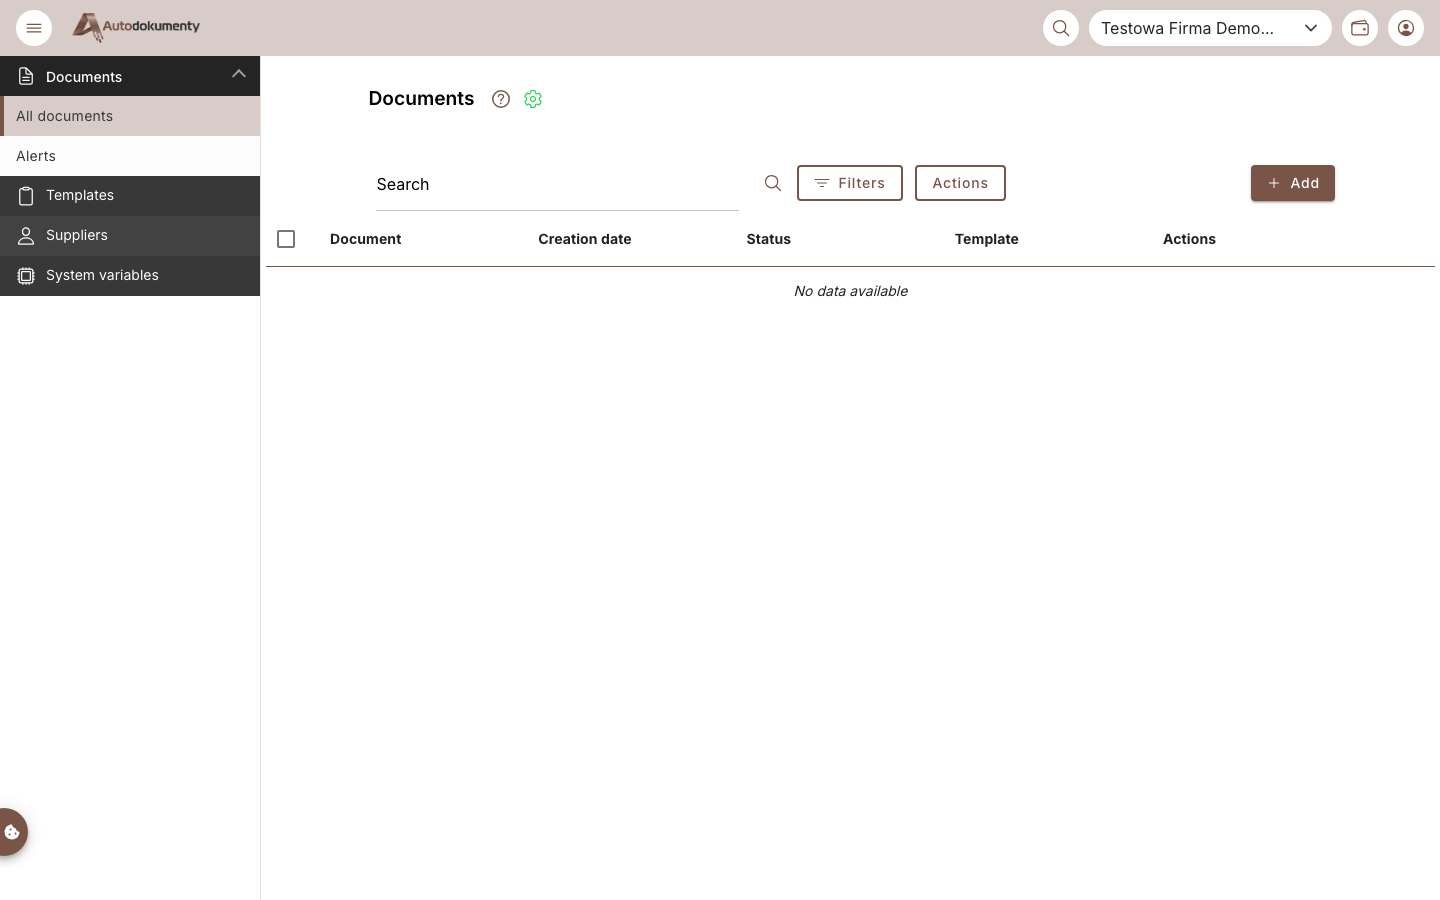
The documents list is empty at first (No data available) — use + Add to create your first document.
What's next
- Switch between companies anytime from the company picker in the top bar.
- Learn how to move around the app in Navigating the app.
- Continue to document creation, templates and e-signing (next sections).
This page is part of a documentation proof-of-concept. Screenshots are generated automatically from the test environment. The completed-form screenshot is shown in the Polish interface as an example; field names above are the English labels.